Continuing with my recent obsession with the Birthday Cake Explosion Box, I am sharing one that I made for a 21st birthday. I replaced the single candle with a 21-shaped candle and added extra bling using adhesive rhinestones. Check out my project on Cricut Design Space: 21st Birthday Cake Explosion Box.
Diana's Designs
Cricut Birthday Cake Explosion Box
Last week, I tried my hand at the Cricut Birthday Cake Explosion Box project I bookmarked on Design Space many years ago. I loved it so much, I had to make another one! I modified the project by replacing the square and triangular cuts that had cut out patterns with design paper and I really love the look of it.
I also added a personalized sentiment to the front of the box and adhered it with foam tape to give it some dimension.
I also added a personalized sentiment to the front of the box and adhered it with foam tape to give it some dimension.
Top 6 Adhesives for Paper Crafts

As a longtime crafter, I am always on the lookout for glues and adhesives for a variety paper crafts but often rely on my favourite go-to items. Whether it be double-sided glue tape for gluing larger pieces of paper, two-way glue pens for gluing finer cuts or adhesive foam to make embellishments pop, I always make sure to have some on hand, especially for those last minute projects. Below I highlight my top 6 adhesives for paper crafts.
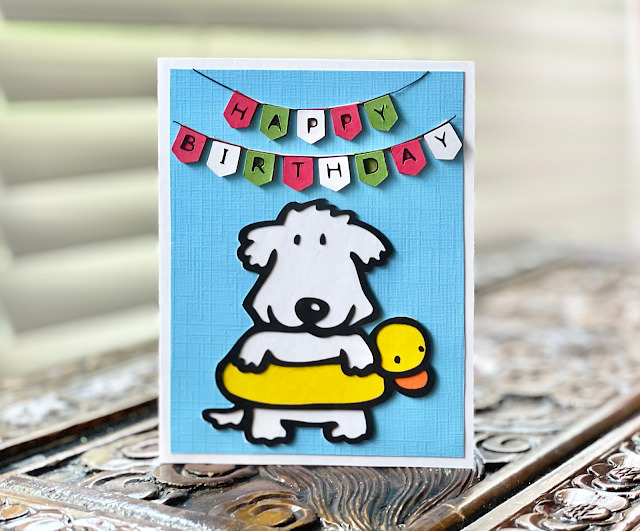
Paper Pups Tube Dog Birthday Card #CricutMade
Of all the old Cricut cartridges I ever purchased for my Expression, the Paper Pups cartridge was among my favourites. I used the tube dog for this birthday card that I had made for my goddaughter, who is a synchronized swimmer. I used the contour and offset features in Design Space to isolate the yellow tube and orange beak.
Peppa Pig Personalized Birthday Card with Matching Envelope
I'm back! I won't even say how long it's been since I've posted here on my craft blog. But I absolutely love how my latest Cricut creation turned out, I simply had to share. I'll keep this post short and sweet, though. Using the Cricut Design Space, I used the print and cut feature and created a layered cutout of Peppa Pig using foam tape from the dollar store. The sun is from the Paper Doll Dress-Up cartridge but I removed the eyes and mouth. The font was a little too small but I ended up using it anyway, despite it being a slight challenge to adhere using my Zig two-way glue pen. The flowers were cut out with a punch and then I added self-adhesive rhinestones from the dollar store.
Cricut Create a Critter Bunny Card
Taking inspiration from an adorable bunny gift bag, I decided to make a bunny themed birthday card for my BFF's daughter. I used the bunny cut from the Cricut Create a Critter cartridge and added a circle frame to it using the Design Studio. As usual, I stuck with a standard A2 card size, so the bunny itself is about 2". I couldn't figure out how to crop the bunny to fit the circle using the Design Studio so I just cut off the lower parts after I adhered it to the circle.
Create a Critter Squirrel Birthday Card
I'm baaaack!
I know it's been a long time since I last posted, way too long. The truth is I haven't been crafting as much as I used to. I've been lacking the inspiration, the time and the patience as of late. But I recently took advantage of an Amazon Prime Day deal and I bought a Cricut Expore Air 2. Since then, I have made a handful of crafts and I am eager to get back in to crafting regularly. Today I share the first card I made using my new machine. It's a birthday card in a standard A4 size. The squirrel is from the Cricut Create a Critter cartridge and it's about 3". I removed a couple of contours using the Design Space contours feature to hide the eyes, nose and mouth since I wanted to hand draw the face. The grosgrain ribbon is from a box of chocolates I was given by one of my students. I used foam dimensional dots from the dollar store to adhere the critter to the card front. Isn't this squirrel a cutie?
Subscribe to:
Comments (Atom)


